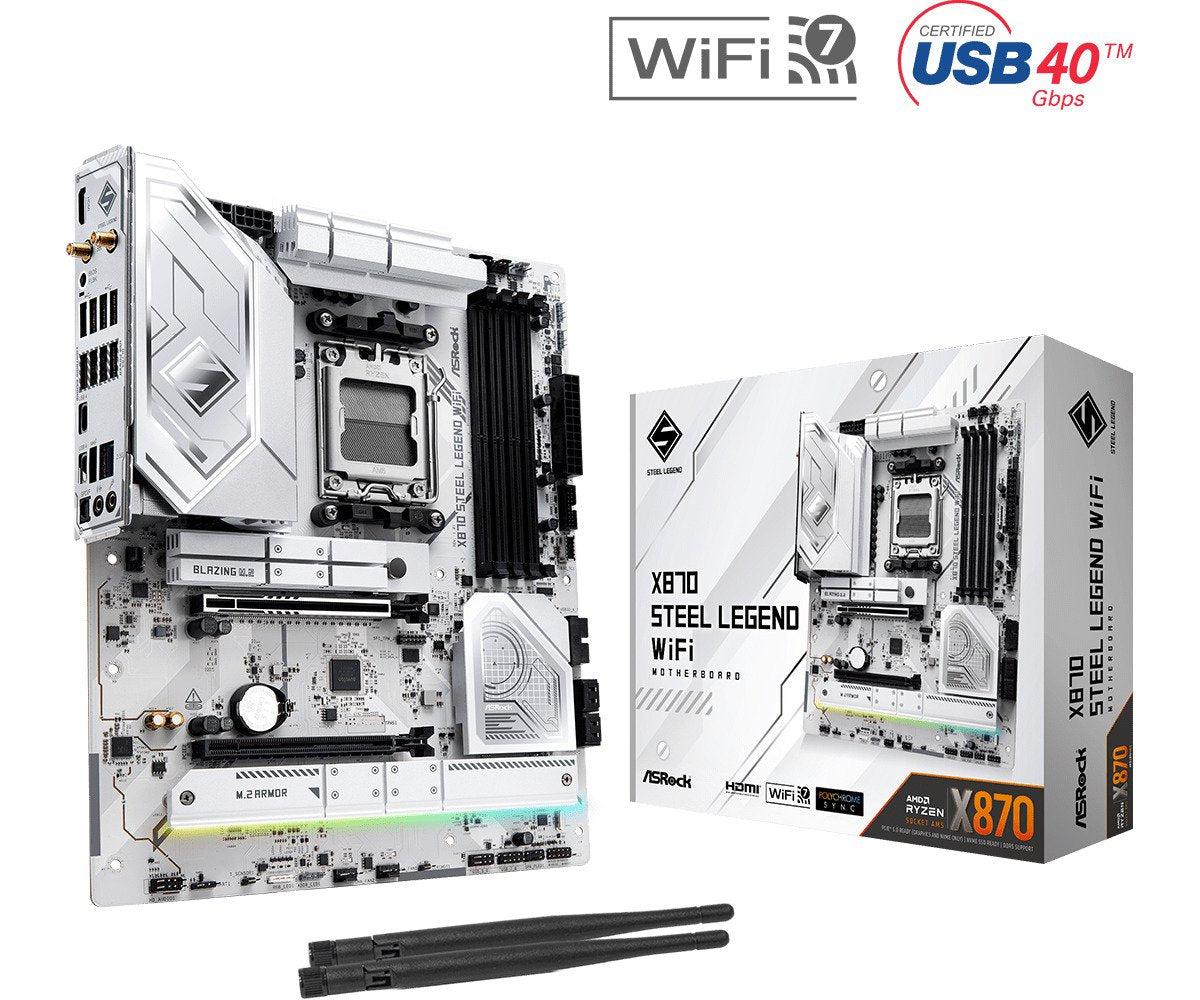
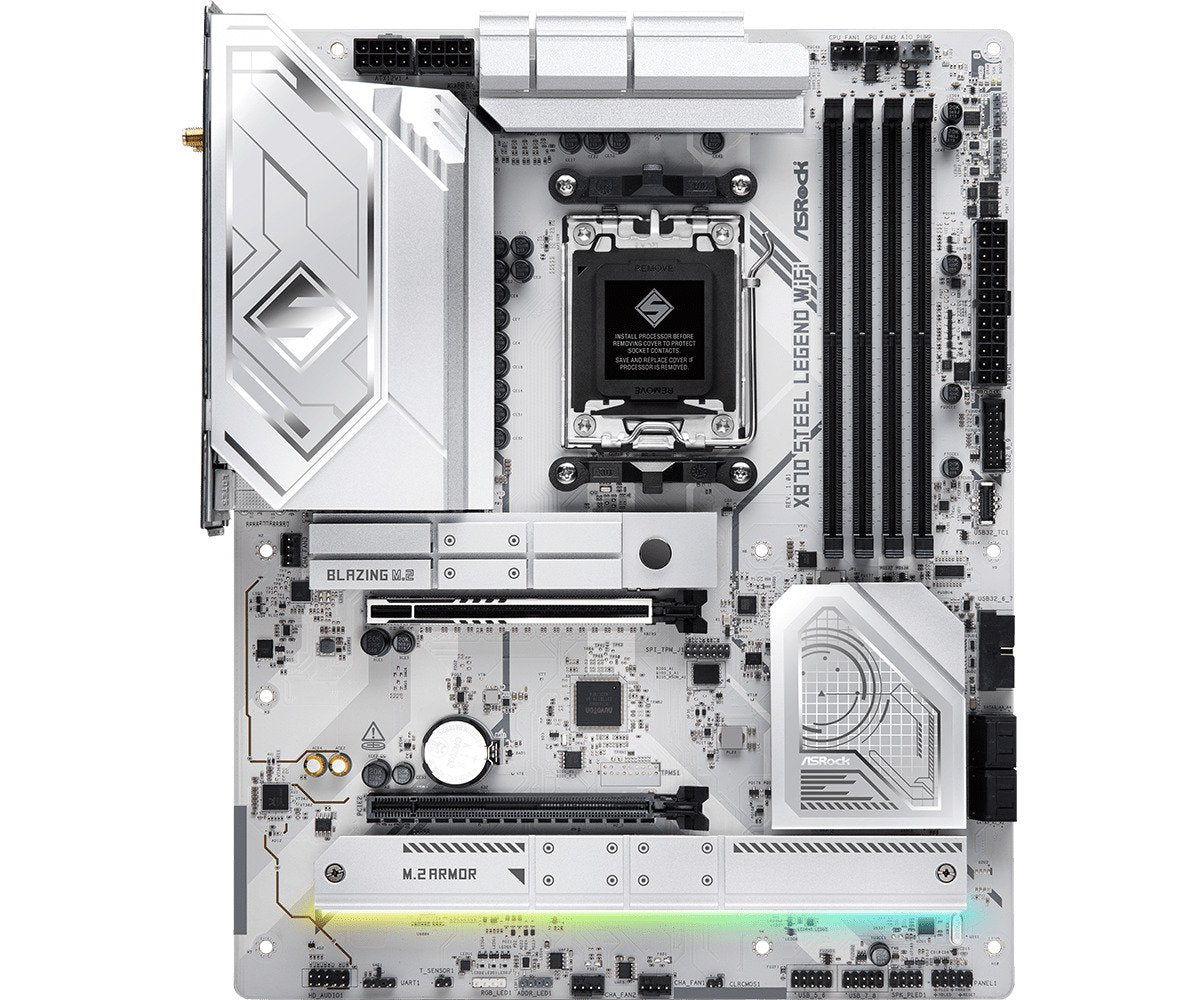


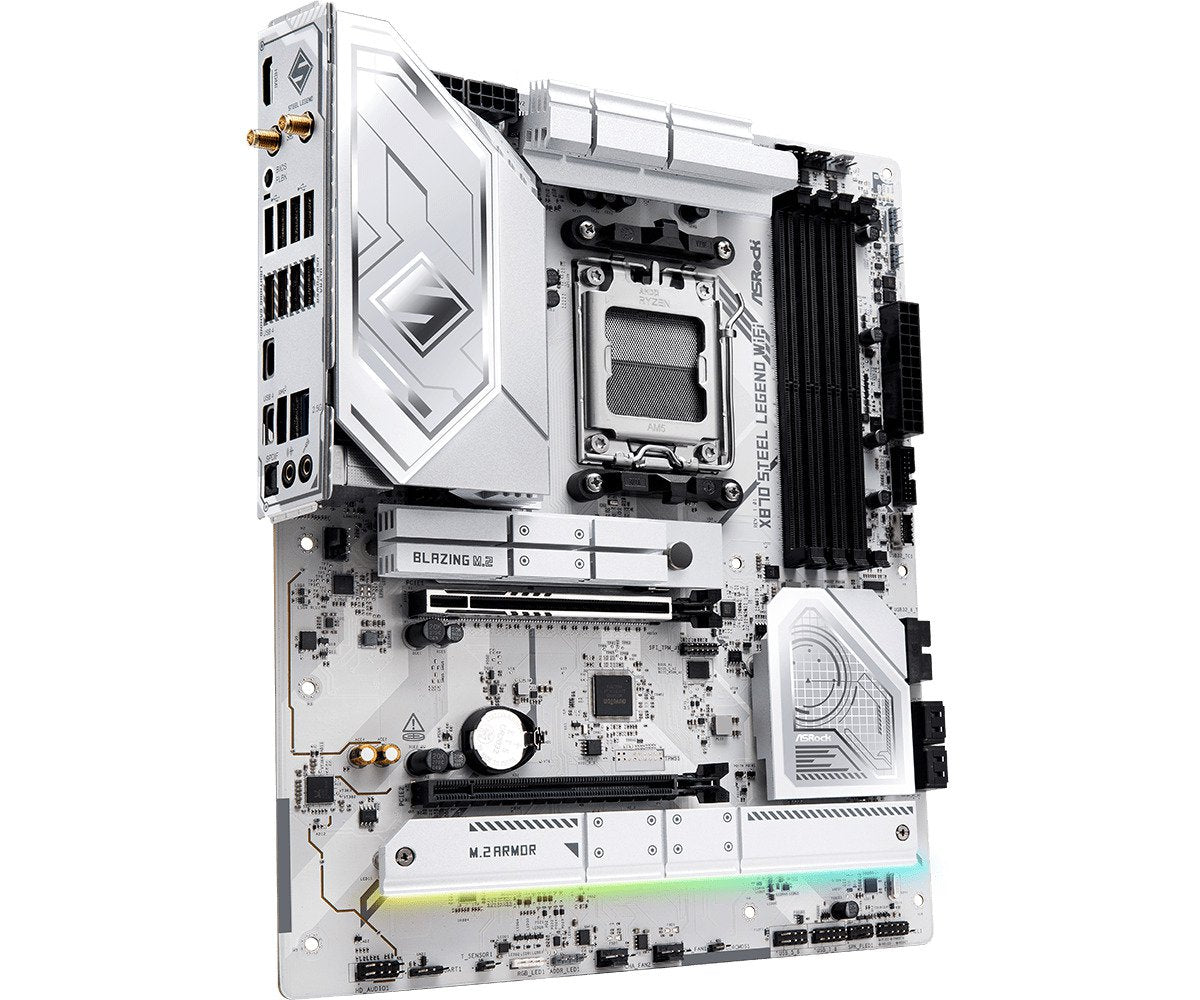
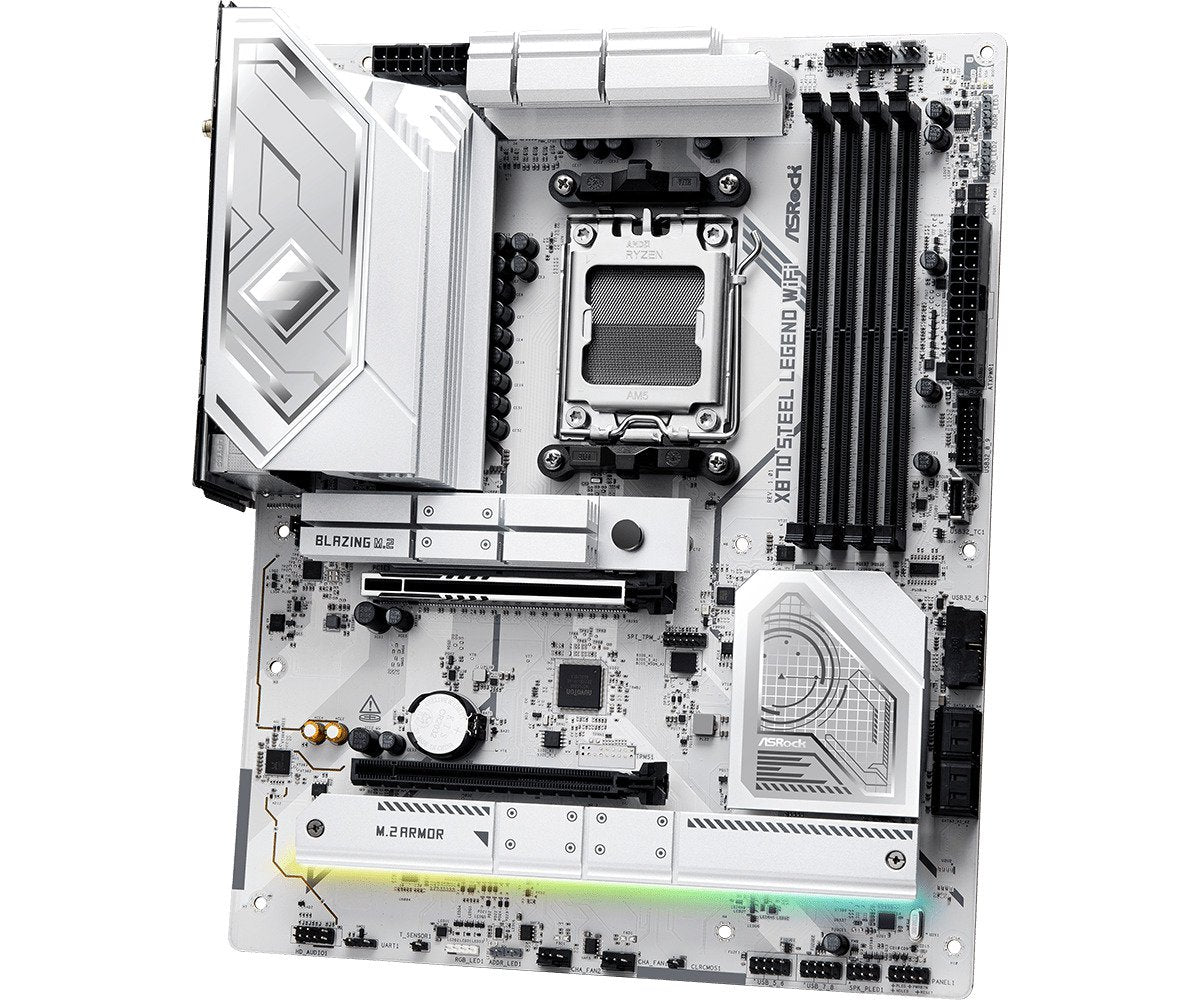
ASRock X870 STEEL LEGEND WIFI
ASRock X870 STEEL LEGEND WIFI
Couldn't load pickup availability
The AI-Powered Beast: ASUS ROG STRIX X870E-E GAMING WIFI
The ASUS ROG STRIX X870E-E is a high-performance motherboard built to handle the future of PC gaming and creation. It is loaded with bleeding-edge technology like Wi-Fi 7, blazingly fast 5Gb Ethernet, and dual PCIe 5.0 M.2 slots for the absolute fastest SSDs. With its dual USB4 ports, AI-powered overclocking, and premium cooling, this board is the perfect, feature-packed foundation for the newest AMD Ryzen CPUs and a build that will dominate for years.
⭐ Highlights
⭐ Highlights
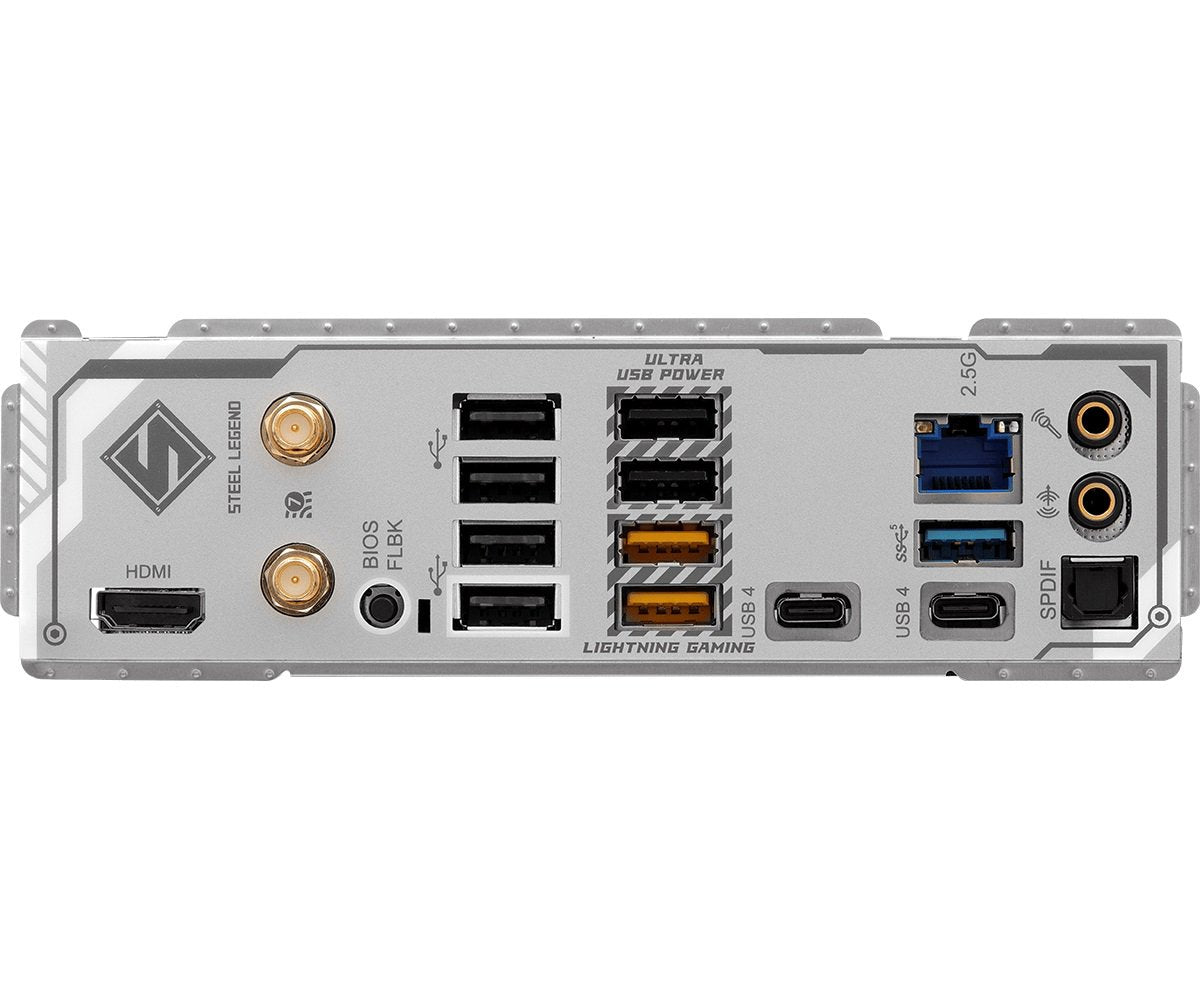
All-White Steel Legend Aesthetics | Single PCIe 5.0 M.2 Slot | Dual USB4 (40Gbps) Type-C Ports | Built-in Wi-Fi 7 and 2.5G LAN | 14+2+1 Phase Dr.MOS Power Design
⚙️ Specifications
⚙️ Specifications
Motherboard Socket Type: AM5 (Supports AMD Ryzen 9000/8000/7000 Series)
Motherboard Chipset: AMD X870E
Motherboard Form Factor: ATX (12.0 x 9.6 inches / 30.5 x 24.4 cm)
Motherboard RAM Type Speed: DDR5-8000+ (OC)
Motherboard RAM Slots: 4 x DIMM Slots
Motherboard Max RAM Capacity: 192 GB
Motherboard PCIe Slot Primary: 1 x PCIe 5.0 x16
Motherboard M.2 Slots: 5 x M.2 Slots (3 x PCIe 5.0 x4, 2 x PCIe 4.0 x4)
Motherboard SATA Ports: 4 x SATA 6Gb/s Ports
Motherboard Rear USB Ports: 2 x USB4 40Gbps Type-C, 1 x USB 20Gbps Type-C, 10 x USB 10Gbps Ports (Type-A/C mix)
Motherboard Networking: Wi-Fi 7, Bluetooth 5.4, 5 Gigabit Ethernet (5GbE)
Share


The POST-Check Protocol
-
Standoff Installation
Action: Must ensure metal standoffs are installed in the case for every screw hole on the motherboard and only those holes. Why: Standoffs lift the motherboard away from the metal case, preventing a fatal electrical short that will destroy the board when powered on.
-
The I/O Shield
Action: If your motherboard doesn't have an integrated I/O shield, install the separate shield into the case before mounting the motherboard. Why: Forgetting the shield means you must unscrew and remove the entire motherboard later, which is a massive waste of time.
-
Pre-Install Components
Action: For ease of assembly, install the CPU, CPU Cooler mounting brackets, RAM, and M.2 SSDs onto the motherboard before placing it in the case. Why: Working outside the case avoids cramped spaces and makes critical installations (like the CPU cooler backplate) far simpler.
-
Front Panel Headers
Action: Consult the motherboard manual and use the tiny front panel connectors (for Power/Reset buttons and LEDs) before installing the GPU, or buy a front panel header block to connect them as one piece. Why: These tiny pins are difficult to access once the large GPU is in place, and incorrect wiring means your power button won't work.
-
The Power Duo
Action: Ensure both the large 24-pin ATX power cable and the 8-pin (or 4+4 pin) CPU power cable are firmly clicked into the motherboard. Why: The 24-pin powers the board, but the 8-pin is the dedicated line for the CPU; skipping the latter means the system will not boot.
-
RAM Seating
Action: Press the RAM sticks firmly into the correct dual-channel slots (check the manual for slot numbering, usually A2/B2) until the latches at both ends click securely. Why: Improperly seated RAM is the most frequent cause of a new PC failing to POST (power on self-test).